Sep
2015
Baby Footprint Christmas Ornaments Project
What’s that? You’re already thinking about Christmas? So am I! I usually start planning in September. ESPECIALLY for crafts. You may remember a few of my favorite Christmas projects of the past, such as these paw print ornaments and this advent calendar. I love giving handmade Christmas gifts from the heart 🙂
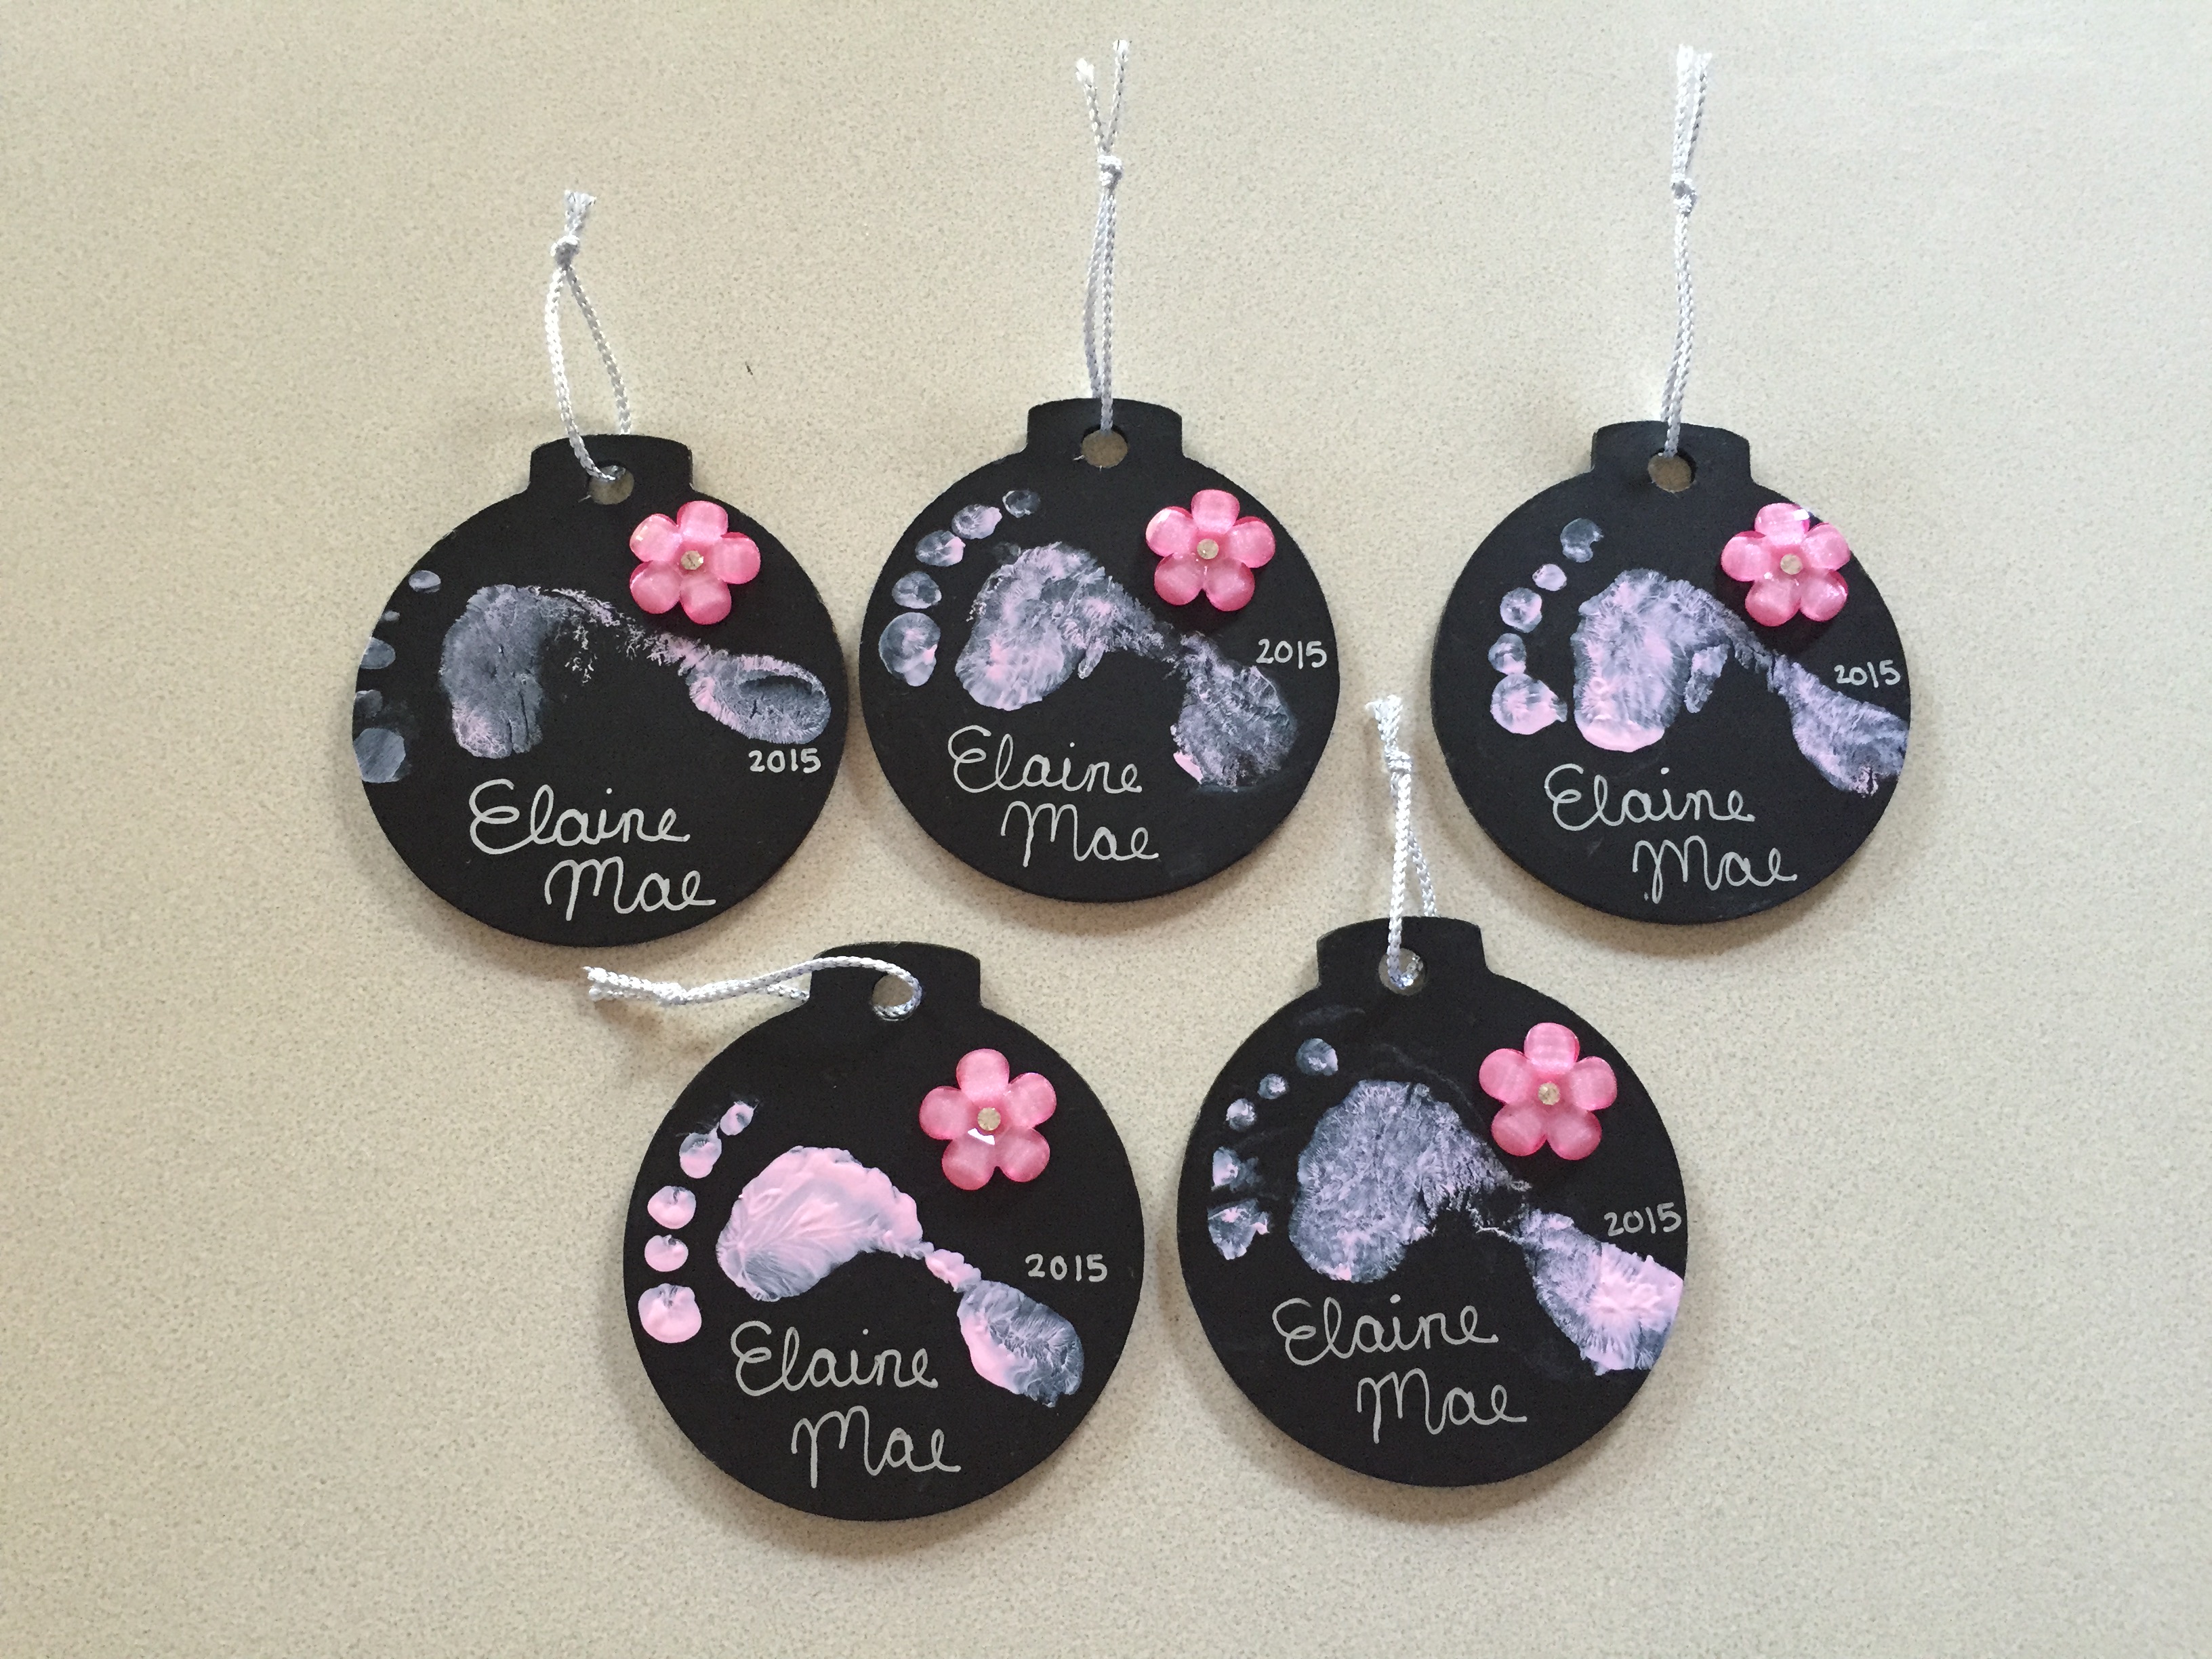
This year, we are making Baby Footprint Ornaments! They are super simple, cheap, and quick – so what’s not to love?
Materials:
The entire project cost me only $17.43, and I purchased all of the materials at Michael’s. Here is what I used:
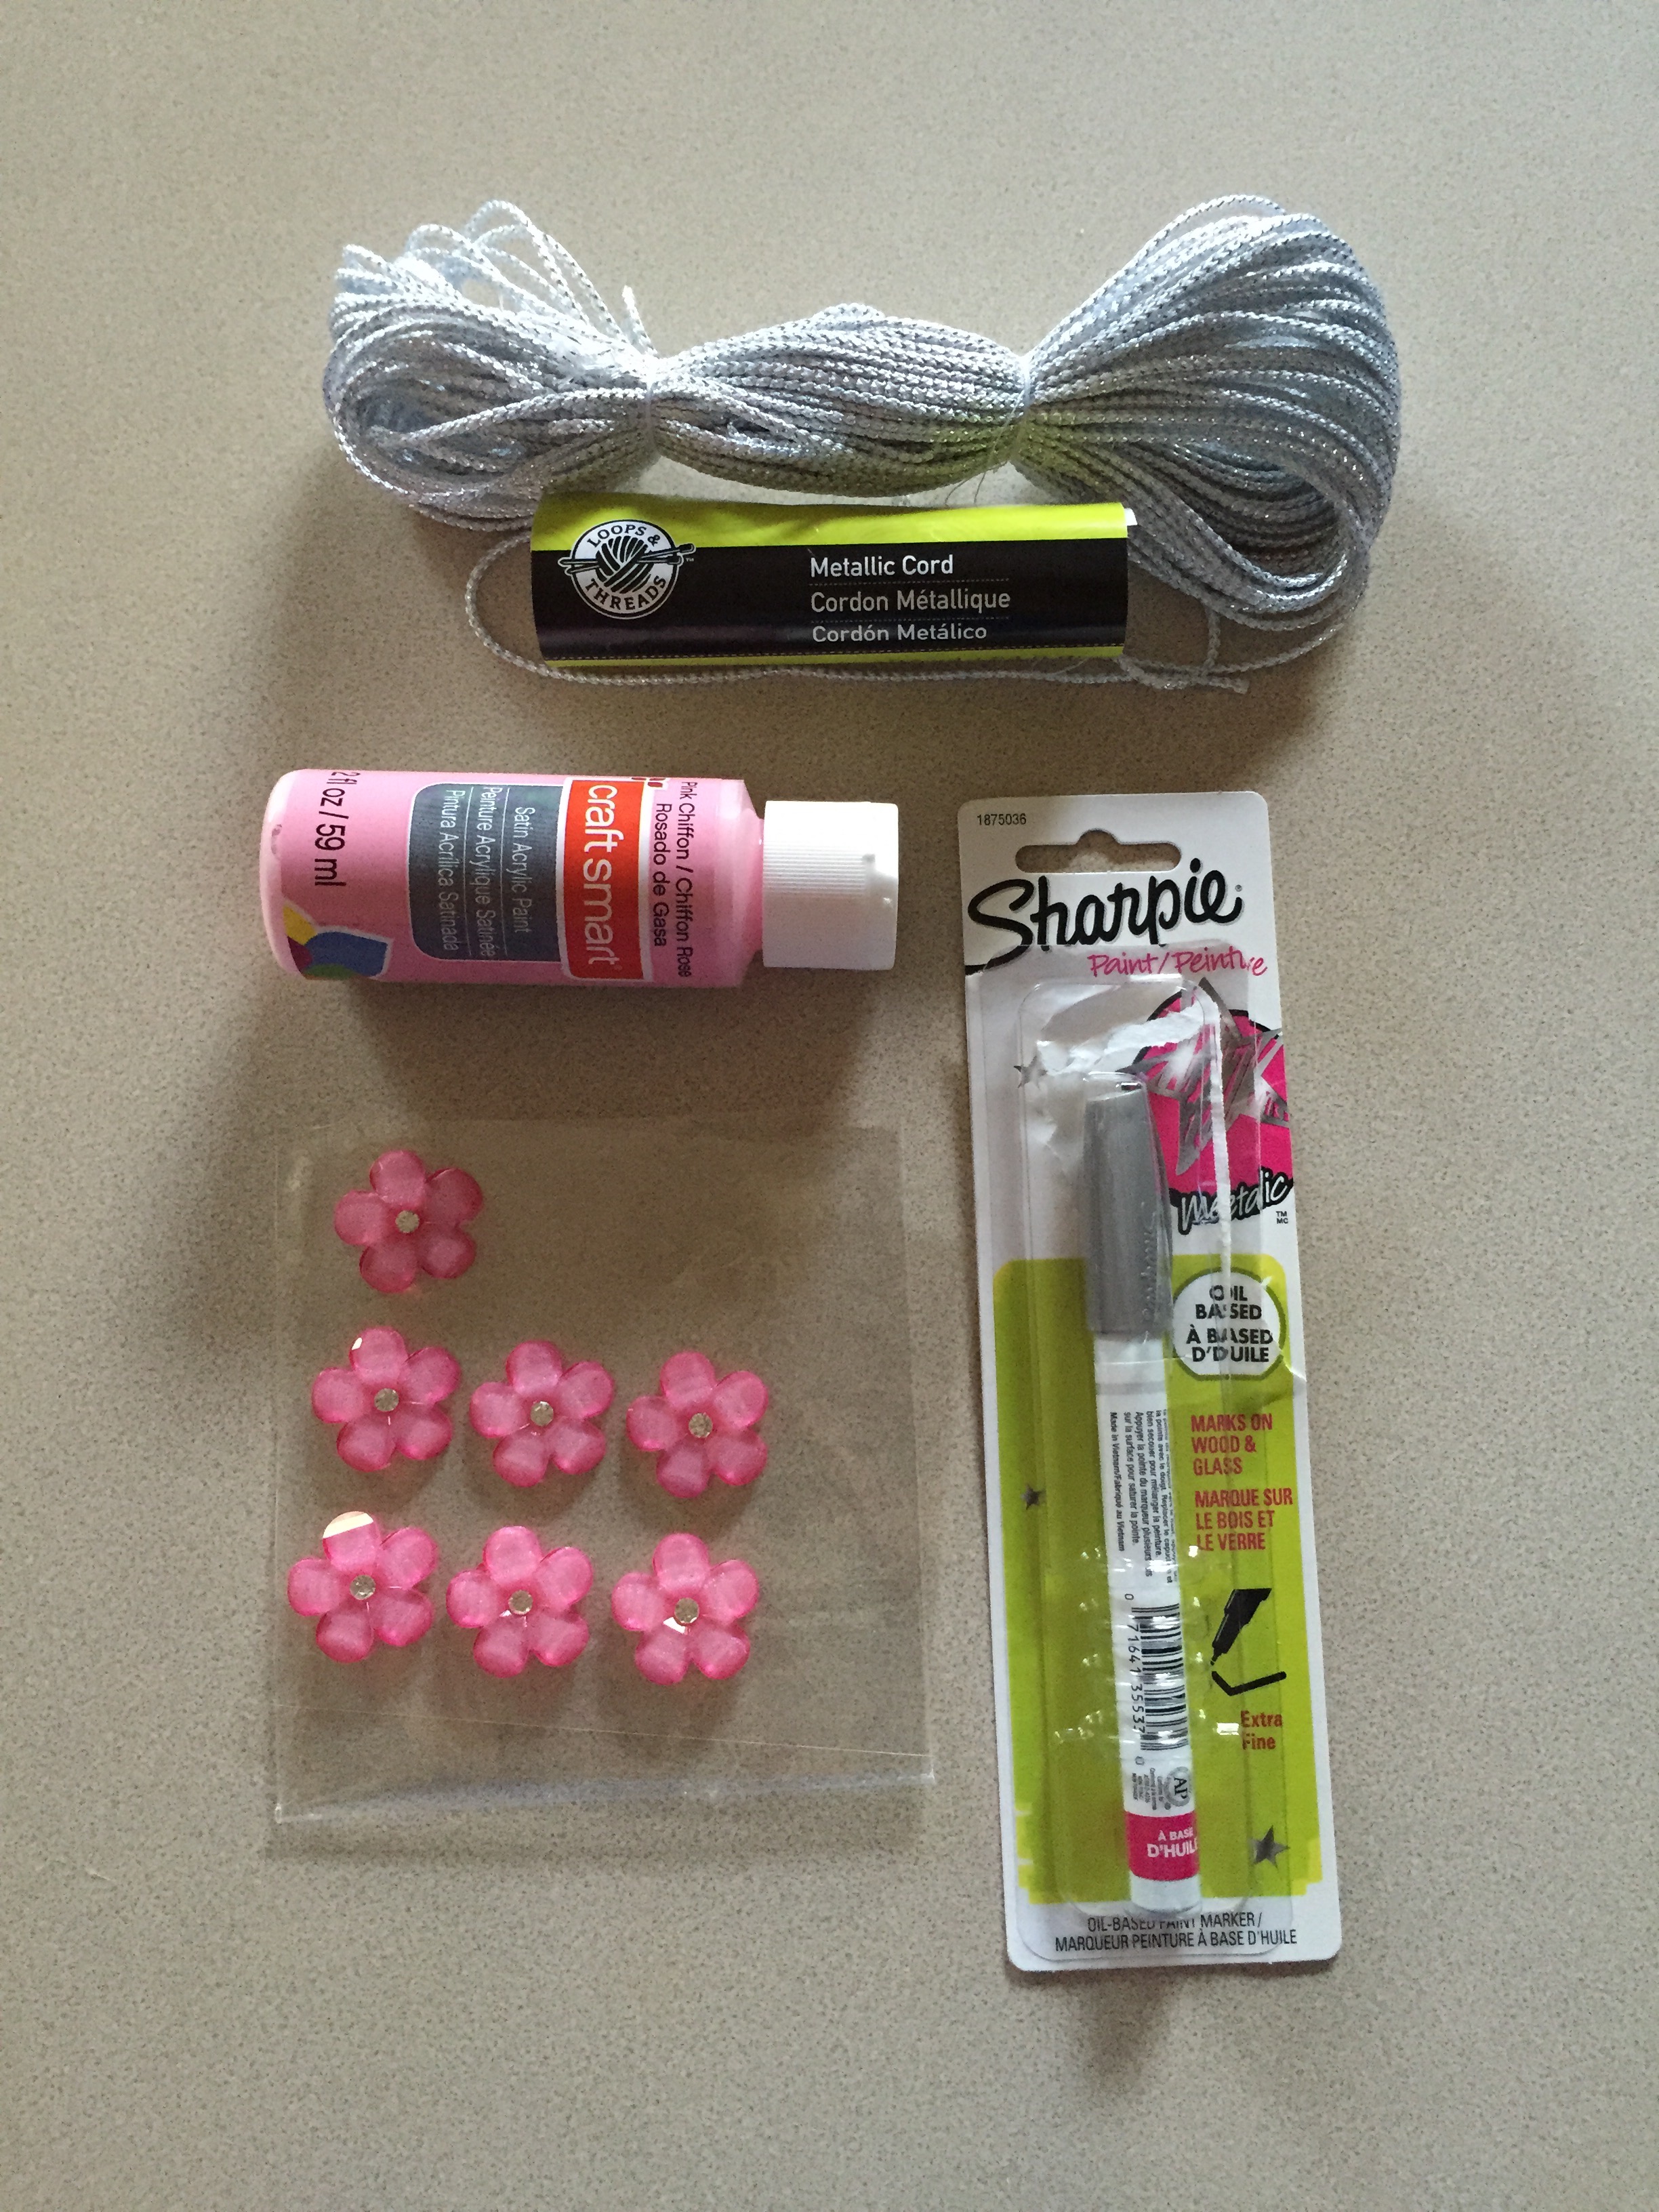
The ornaments themselves were only $1.49 each, on sale for 40% off! I also purchased some acrylic paint for $0.79, a Sharpie paint pen (get oil based so it’s permanent), some metallic cord, and an embellishment (by the sticker aisle).
Other materials you’ll want handy:
* a paper plate for spreading the paint and dipping baby’s foot
* baby wipes for cleaning baby’s foot
* paper towel
* scissors for trimming the cord
Procedure:
First, I laid out all of the materials on the table so they were within arms reach. Once you start, you aren’t going to want to get up to retrieve anything you forgot.
Next, I laid paper towel under my baby’s foot. She’s pretty squirmy, but we managed to keep the paint contained. I kept a hand on her painted foot at all times. You may want to use a drop cloth or old towel/sheet.
Then, I spread the paint on the paper plate. A dime sized amount is perfect. You don’t want it too thick, just enough to dampen baby’s foot. Too much paint makes everything squishy and messy and you don’t get the neat details of baby’s foot.
Dip baby’s foot in the paint (blot off any excess with a paper towel), then roll the wooden ornament up her foot from heel to toe. If you make a mistake (or if baby squishes her toes, because paint feels so cool!), just quickly grab a baby wipe and erase the mistake. The final products above represent at least 3 tries on each ornament. I would wipe, let it dry, and try again. No problem!
Once you have the final look that you like, let it dry for about an hour (depending on paint thickness) before adding your text and/or embellishments.
Good luck, and I hope you enjoy this easy, quick, and cheap project!
![]()